How to make a mask that fits
This is a step-by-step tutorial for making my “Armadillo Gold”
This mask is made of three layers: two layers for the front of the mask and a back layer to form an inside pocket for inserting a removable filter. It can be worn with or without a filter. If you use a filter, the mask will become a four-layer mask. This is why I named it “Armadillo Gold”.
I usually name the items I make. It helps me refer to them, it quickly creates a mental image of what I am talking about and believe me, when you fall into the sewing rabbit hole, it is can be very handy to remember where you are going.
This mask is a non-medical mask. It follows the recommendations of the CDC and French health officials. Their advice is that cloth masks should ideally be made in cotton, be triple-layered, have no sagittal seam (vertical seam on the nose) and be washable at hot temperatures.
This tutorial is intended to be used by intermediate makers
I hope this saves you many trials and errors.
I choose not to sell my masks. If you were donated one of them or are grateful for this tutorial, please consider a donation to the North East Valley Community Development Project.
Download the workbook and make your "Armadillo Gold" today!
Donate to the NEV Community Development Project
To make an Armadillo Gold you will need to spare attention and time. It is a good option if you are looking to make a beautiful mask for a loved one, or make a mask out of a special material. But if you are looking for a quick way to make many masks check my post : “The best way to make 12 masks in one go”.
What you need for your Armadillo Gold
• A pair of scissors or rotary cutter
• A sewing machine (+ a zipper foot)
• A ruler
• A felt pen
• A safety pin
• Two different fabrics (100% cotton with a tight weave)
– a fashion fabric.This will be the outside of the mask.
– a plain lining. This will be the inside of the mask.
• Thread and pins
• Two lengths of elastic (15 – 20cm each)
• A nose bridge (pipe cleaner, a short length of twisted garden wire)
• Two cardboard templates
Process
1 - Washing your fabric
2 - Preparing your cardboard templates
3 - Making the front panel (A)
4 - Making the back panek (B)
5 - Sewing front and back panels together
6 - Forming the pleats
7 - Inserting the nose bridge
8 - Closing and turning the mask
9 - Making the ear loops
Children (7-12)
Small- A : 17 x 16.5
- B : 15 x 16.5
Woman
Medium- A : 18.5 x 18
- B : 16.5 x 18
Man
Large- A : 20 x 19.5
- B : 18 x 19.5
1 – Wash the material
Shrinking due to washing should occur before you make the mask. Not after. Do not skip this step (just saying…)
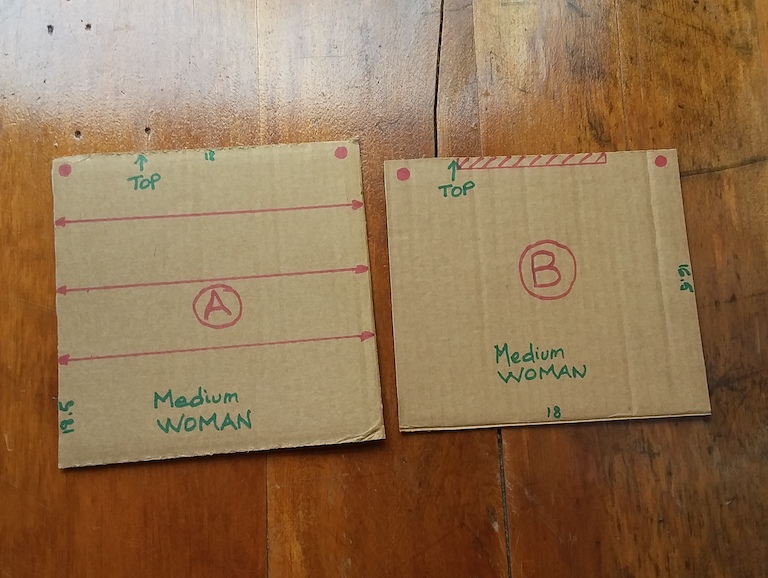
2 – Prepare your cardboard templates
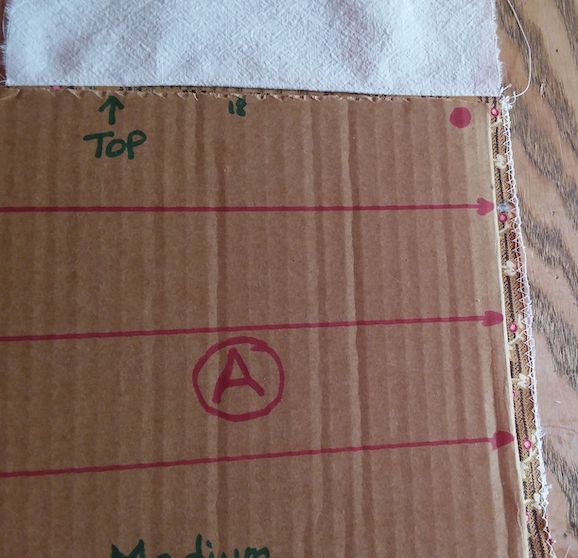
Cut two cardboard templates following the size chart measurements (in cm), then add the relevant markings on each template.
Template (A)
It seems obvious, but seriously, consider writing a big (A) in the centre of your template
Draw two red dots in the top corners to show where the top is.
Trace three horizontal pleat lines every 4cm from the top (4cm-8cm-12cm from the top)
Write width and height dimensions on the relevant sides for future reference.
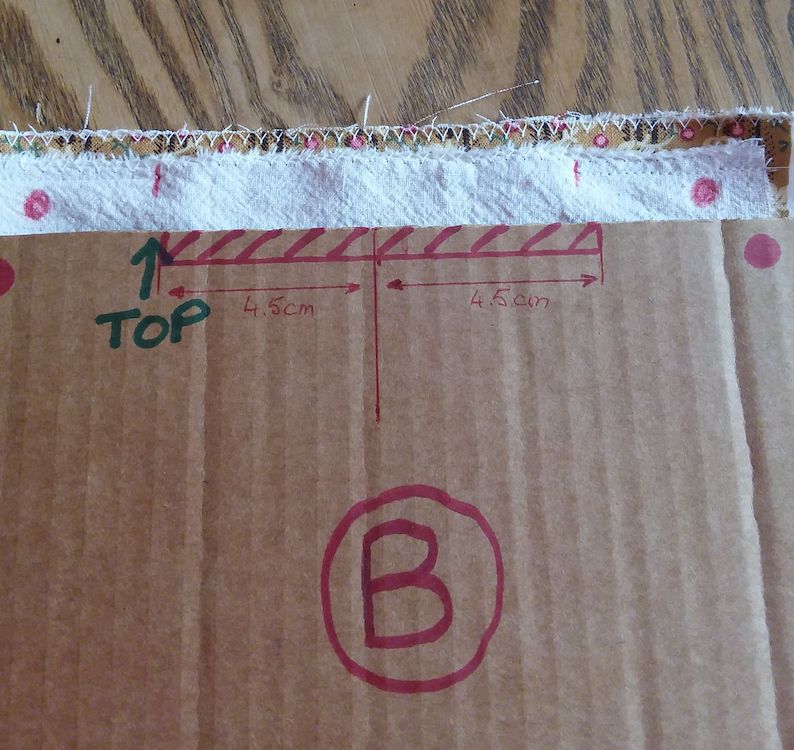
Template (B)
A big (B) in the centre (again!)
Red dots in the top corners
Find the centre of the top edge and mark 4.5cm either side. This will mark the filter opening.
Cut panels and strips
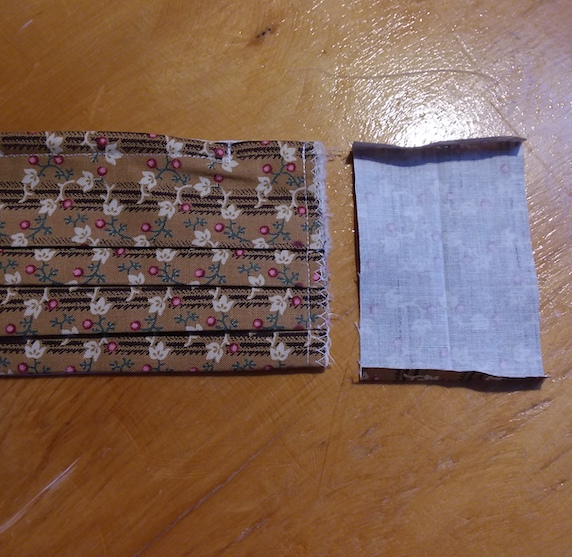
3 – Make the front panel (A)
Cut two rectangles using your new cardboard (A) template.
• One out of fashion fabric
• One out of plain lining
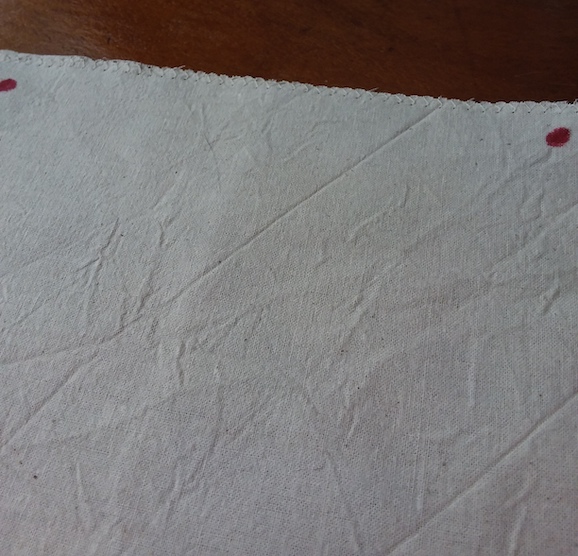
Mark the top corners with red dots directly on the back of your fabric with a pen (as on template).
Pin the two rectangles whilst aligning the red dots, print facing out.
Do a zig-zag stitch all around.
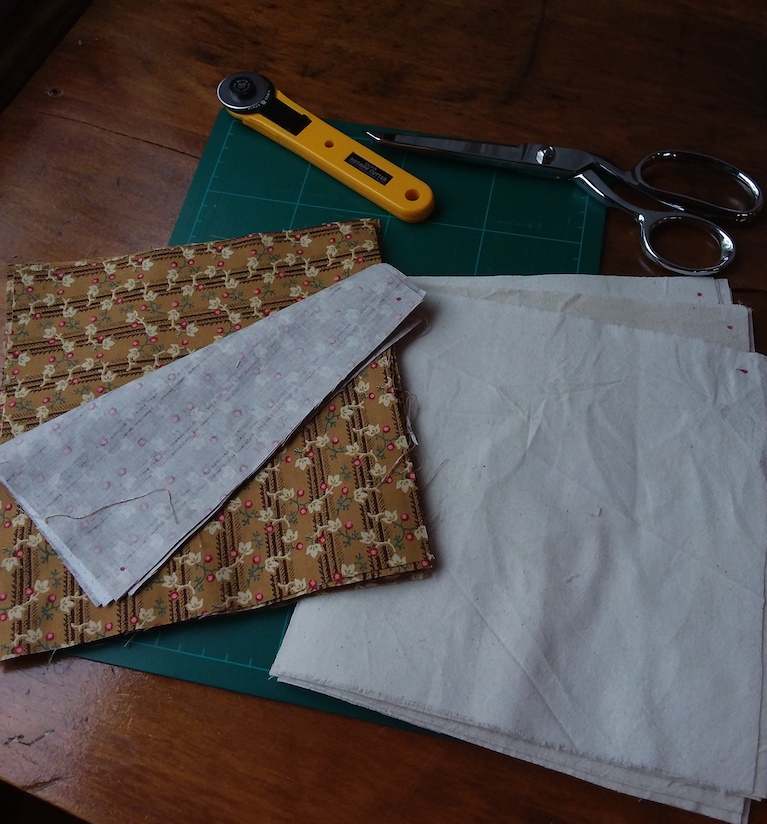
Cut two rectangles using A template

Do a zig-zag stitch all around
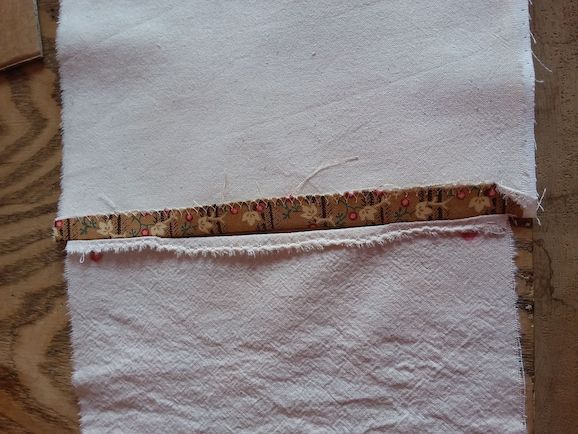
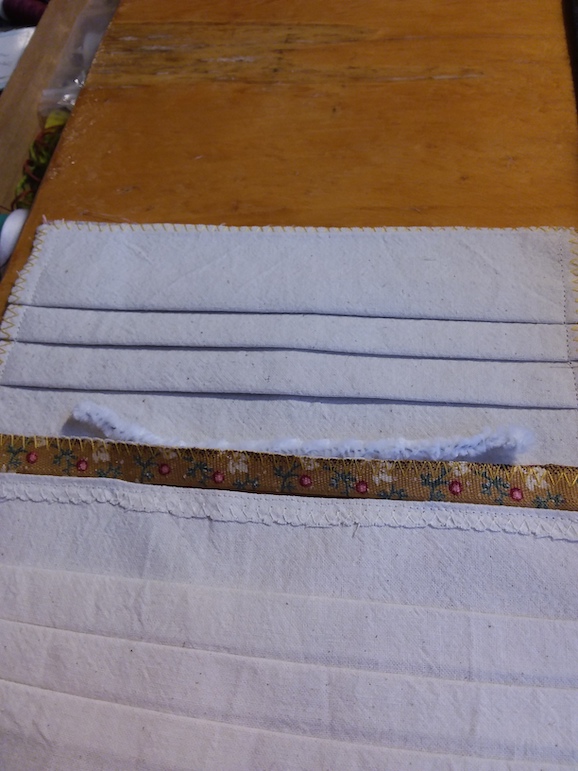
4 – Make the back panel (B)
Cut one rectangle of plain lining using the template (B)
Mark the top corners as before directly on the fabric.
Zig-zag stitch along the top side of the panel (where the red dots are). You can zigzag stitch all around.
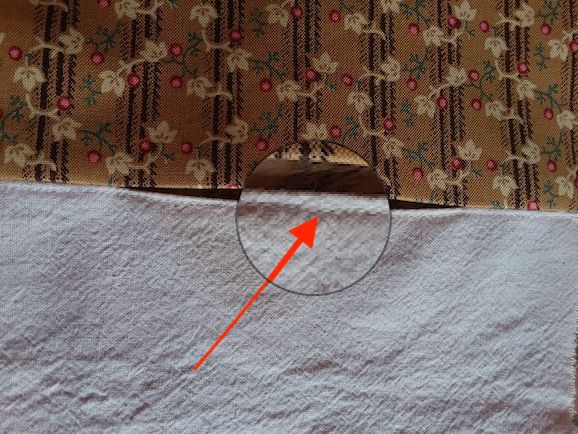
Using your template (B), mark the filter opening directly on the fabric.
Zig-zag stitch along the top side
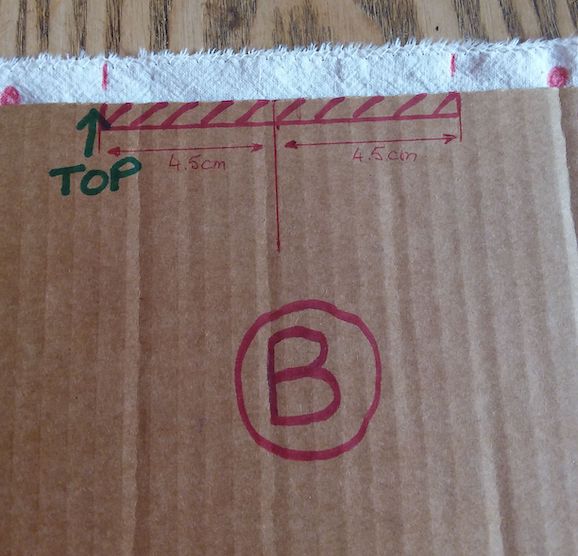
Mark the filter opening
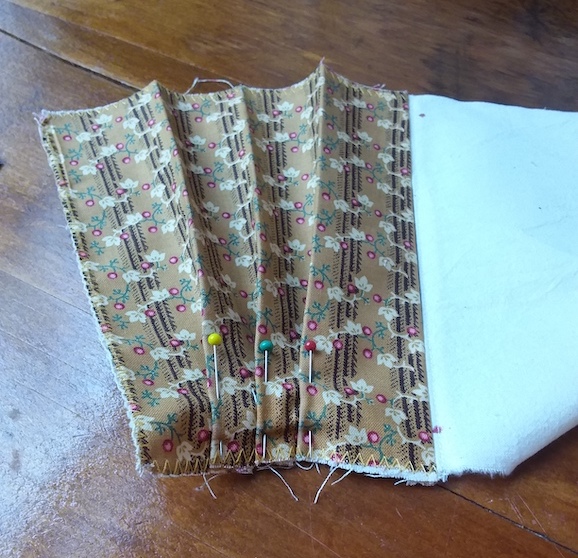
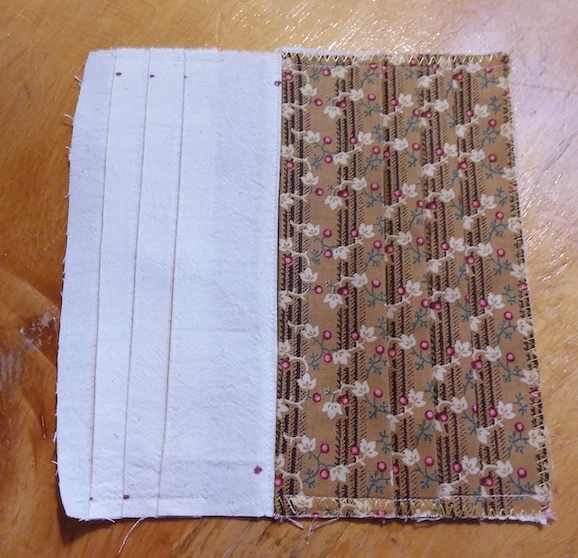
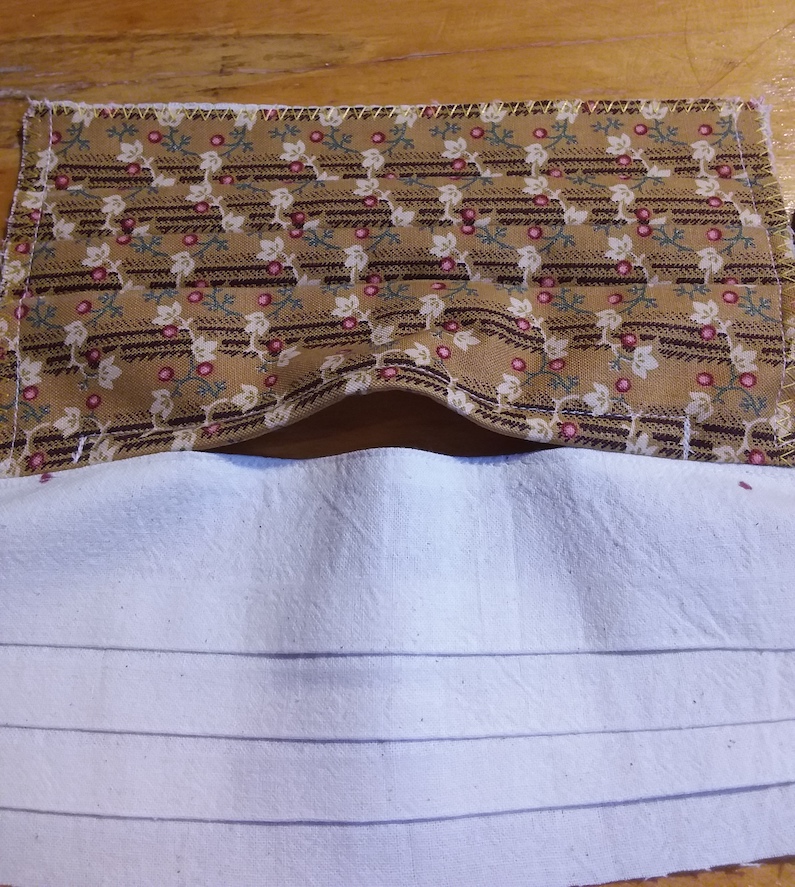
5 – Sew front and back panels together
Position panel (B) on the front of panel (A).
Panel (B) should be 5 mm down from the top of panel (A)
Sew both panels together at 1.2mm from the top of panel (A) but do not stitch the filter opening.
Press the seam open.
DO NOT stitch the filter opening
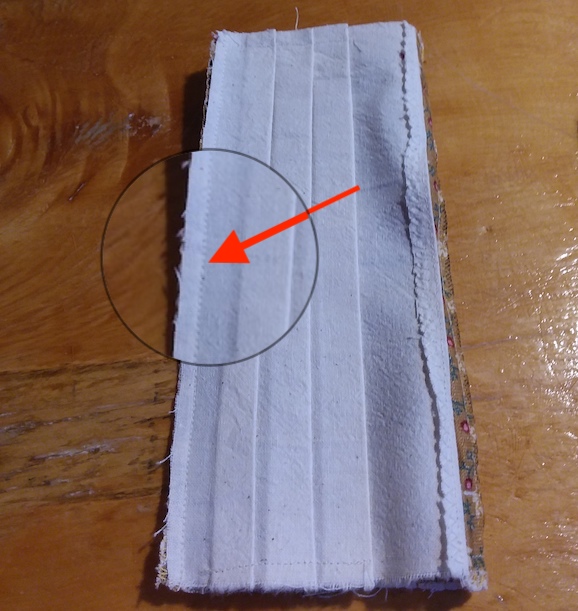
Flip it over.
Stitch the back panel (B) to itself as close as you can to the seam you just sewed. (Only do this for back panel)
Iron the seam open
Stitch the back panel ONLY
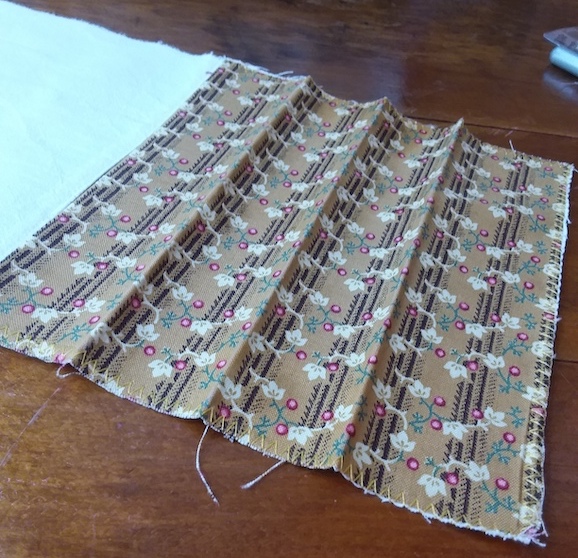
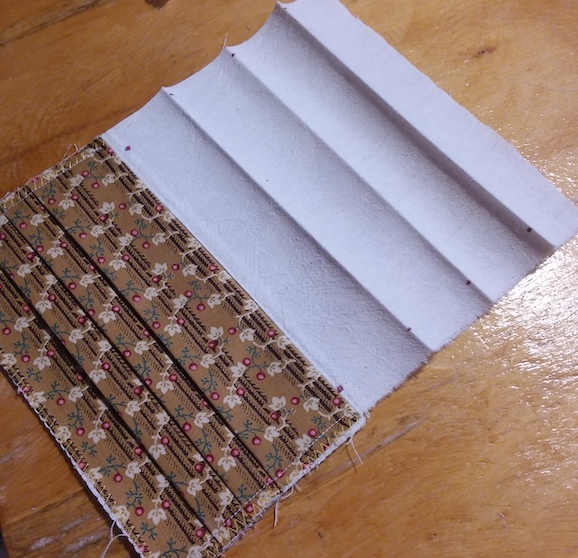
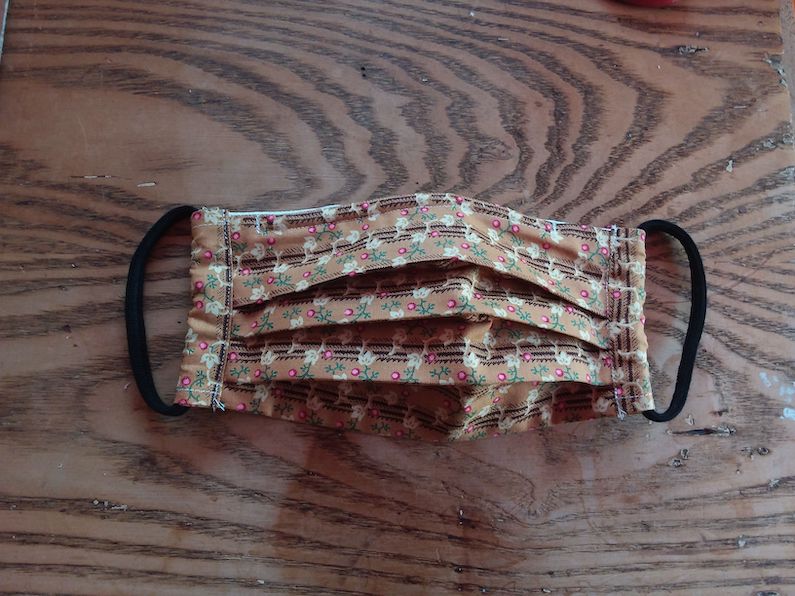
6 – Form the pleats
- Using template (A), mark the 3 pleats directly on the right side of the fashion fabric with a pen.
- Iron the 3 pleats one after the other starting from the top one.
- Fold the pleats under, so that they are facing away from the top. They will be pointing down on the final mask.
- Pin the pleats in place on that side.
- It helps to fold your front panel in half to check that pleats are even.
- Pin the pleats on the other side.
- Repeat the same process on the back panel (B).
- Sew all pleats in place close to the outside edge of your panels.
Use A template

Mark the pleats with a pen
Iron the pleats
Pin the pleats on one side
Check measurements on the other side
Stitch the pleats in place on A panel
Repeat on B panel
Pleats stitched in place on both panels
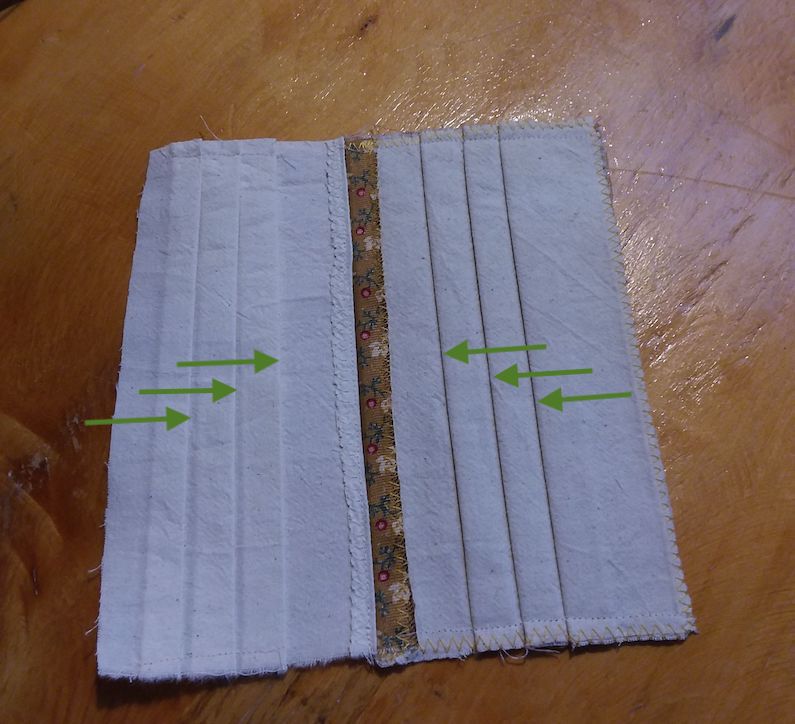
Directions of the pleats
7 – Insert the nose bridge wire
If your machine does not have a zipper foot, it is best to do this step by hand.
Place the pipe cleaner inside the seam allowance of your front panel (A).
Pin in place.
Sew a channel around the wire as close as you can.
Stop-stitch both ends so the wire stays in place in its casing.
Insert the pipe cleaner in the seam allowance

Use the zipper foot around the pipe cleaner
The nose bridge wire in its channel
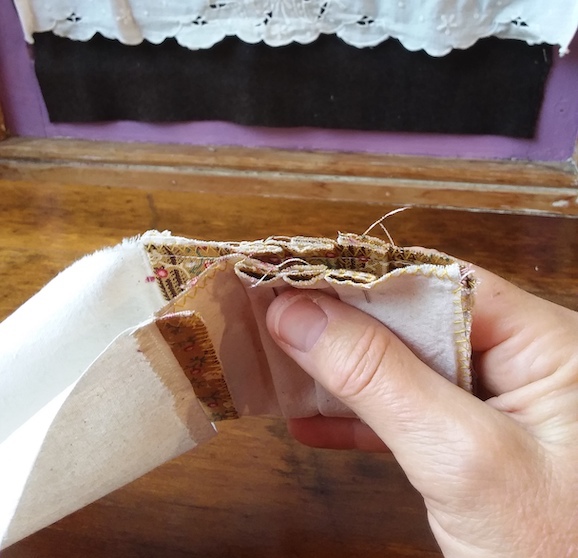
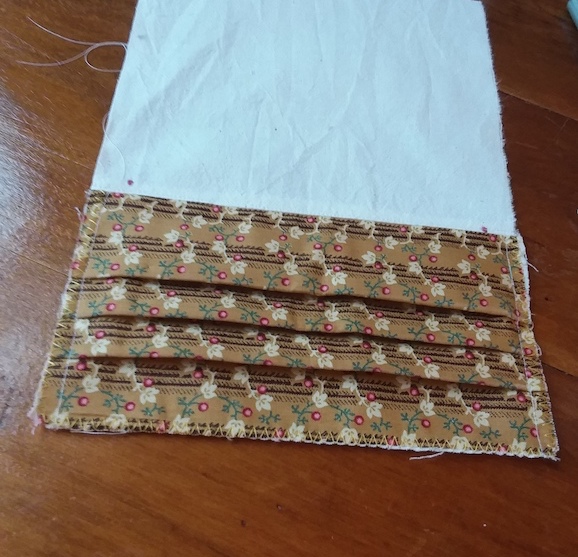
8 – Closing and turning the mask
Stitch panels (A) and (B) at their bottom edge (print facing in).
Turn the mask inside out trough one of the side openings.
Press flat.
Sew the bottom seam of the mask
9 – Making the ear loops
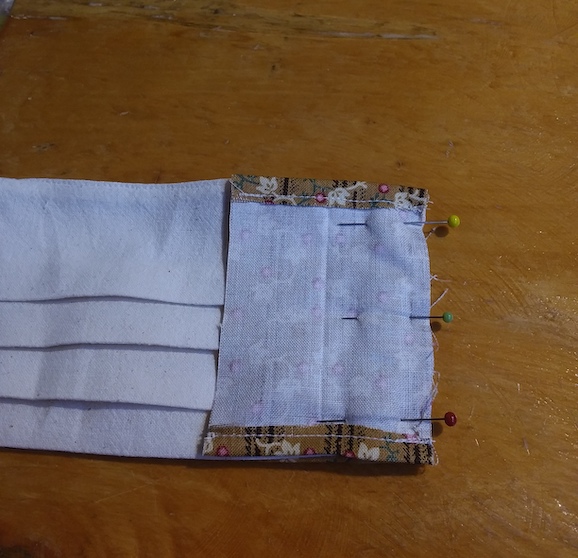
Cut two strips of your fashion fabric (10cm x 5cm).
Place the strips next to the side edge of your mask and fold top and bottom until they are the same height as the mask.
Stitch the folds in place.
Fold the strip lengthwise enclosing the top and bottom folds and press.
Open the strip back up and place onto the back panel print side down aligning the edges.
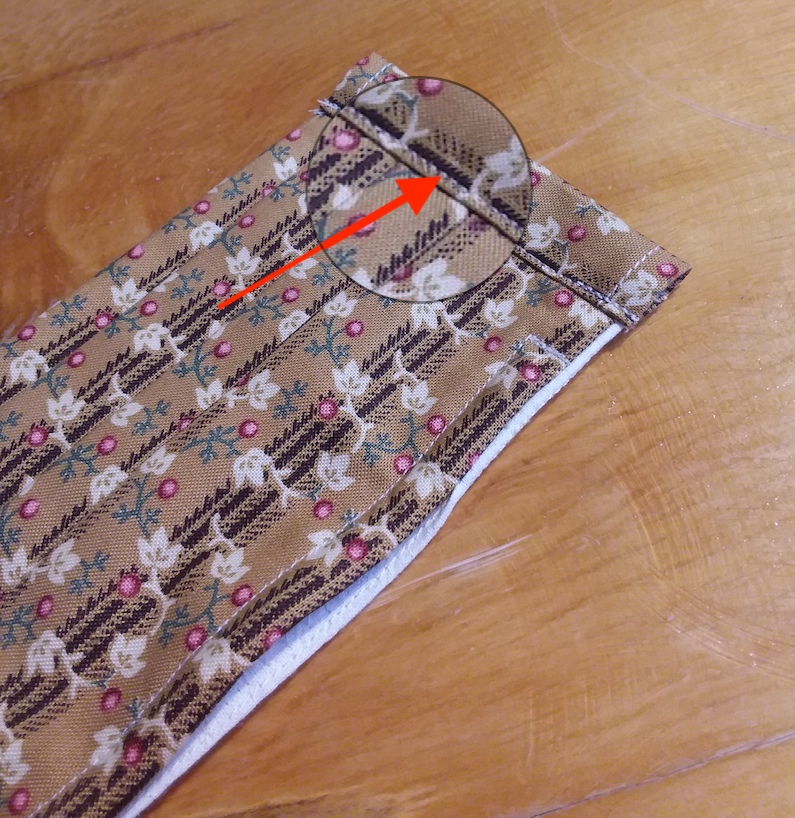
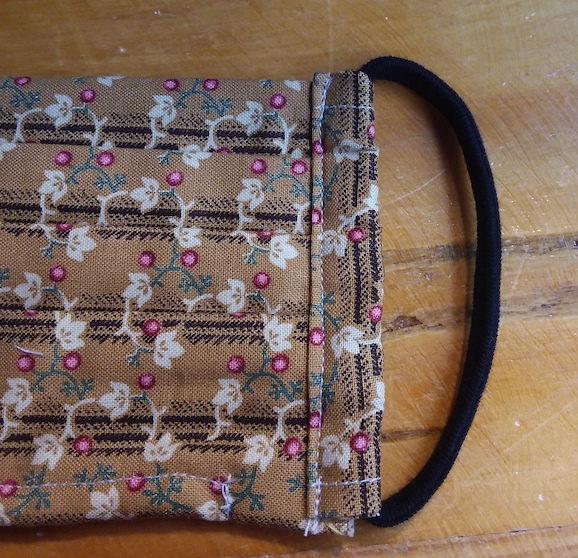
Sew the strip to the back panel on the side edge (along red arrow, 0.8mm from the edge).
Flip the mask over.
Fold the free strip edge in half down to the iron line (1/4 fold lengthwise).
Now fold again, this time over the front panel of the mask and sew the strip there (align with existing stitch).
Fold both ends of the strip
Align edges and sew to the back panel
Flip over. Sew strip to the front panel
Cut two lengths of soft elastic (15cm -20cm). The length of you relastic will depend on its stretch and on the size of your head. You might need to try it on.
Thread the elastic ties through the channels on both sides of the mask using a safety pin.
If your elastic is fine enough, you can simply make a knot and hide it in the casing.
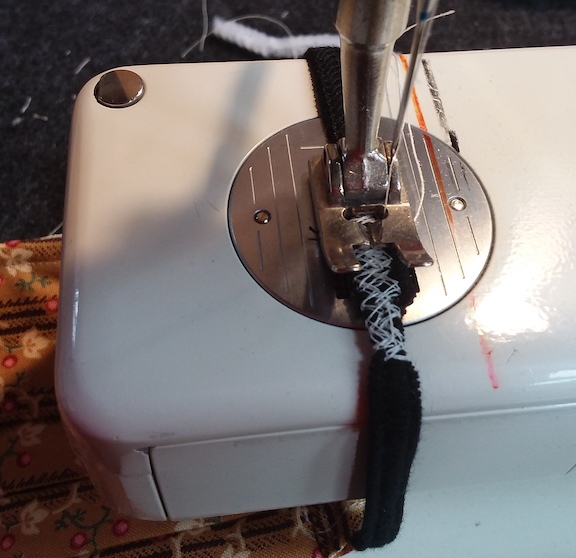
For a wider elastic, stitch the elastic ties edges together with a zigzag stitch or by hand.
Now you can hide the stitch inside the channel by rotating the elastic.
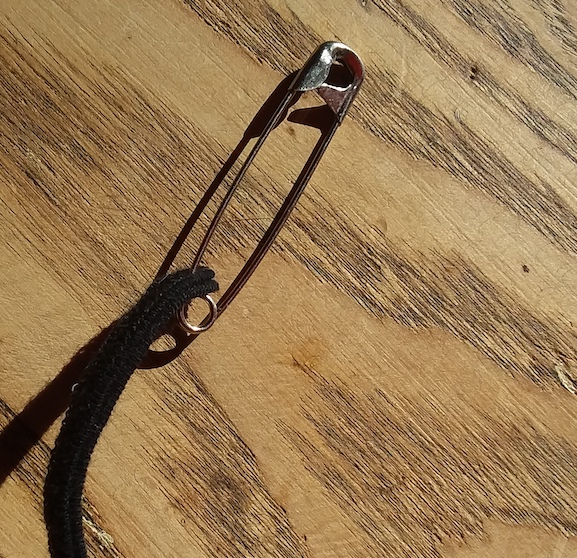
Use a safety pin to thread the elastic
The elastic are stitched together
Secure the elastic ends together
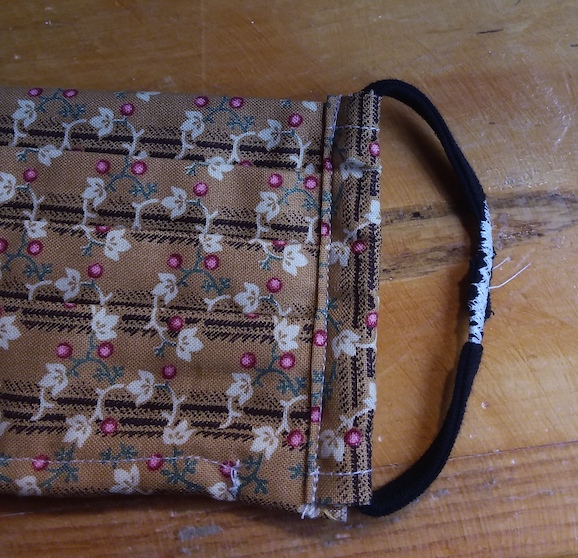
Hide the stitch inside the channel

THE ARMADILLO “GOLD”
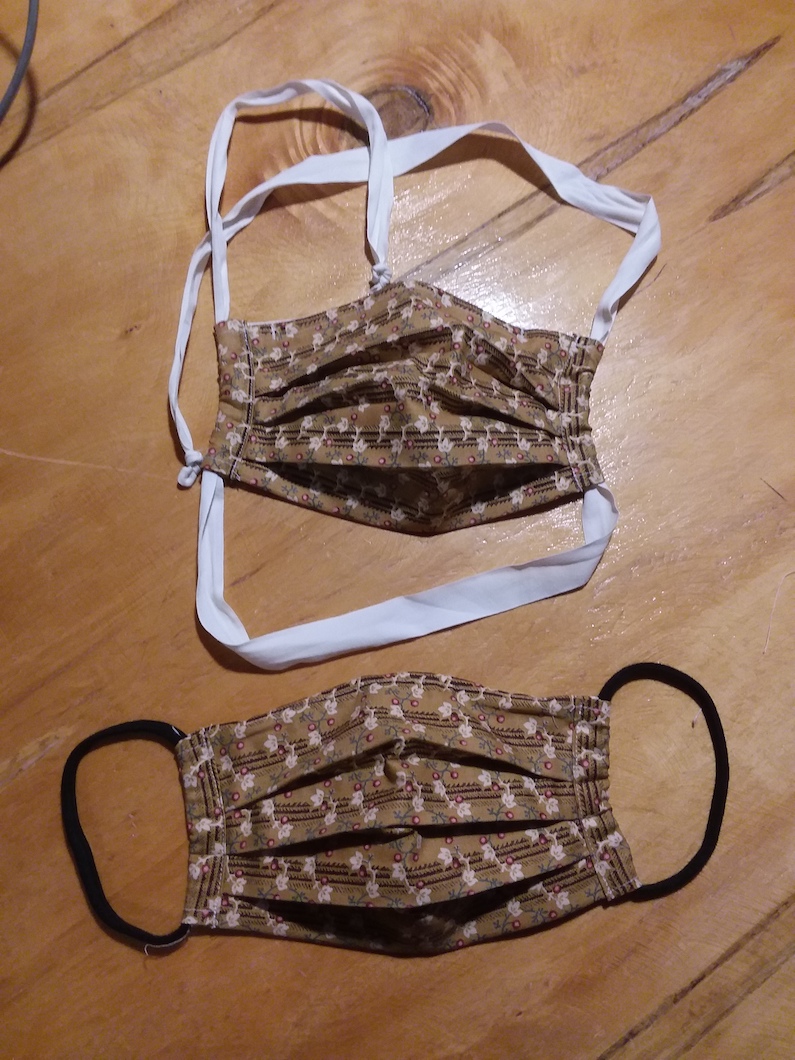
A single 100cm-130cm tie can be used as a variation for a tighter fit
Special thanks to my son Louis who applied his sharp mind to my originally obscure instructions.